
Mindmapping with PlantUML and Emacs
Introduction
The first time I heard about mindmaps came from taking the Learning How to Learn course on Coursera. Since then, I've been using mindmaps everywhere, especially at work.
There are a few good software solutions with Xmind being the best I've used. For several months, I used the Markmap plugin in Logseq, which is easier to use than Xmind and changing the mindmap is just changing your notes. I'd still be using it but I'm working mostly in Emacs. Markmap in Logseq is actually a port of Markmap in Emacs Application Framework (a tool to turn Emacs into a full OS). After several tries, I couldn't get EAF to work. Maybe I'll make another attempt later.
For this tutorial, I'm using PlantUML and GNU Emacs.
Setup
To ensure this runs smoothly later, we want to do some setup. My initial experience was not so smooth, so this was a lot of trial and error.
Installing PlantUML & plantuml-mode
To install PlantUML on your computer, you're on your own. PlantUML was in the Software Station on GhostBSD, so that's how I installed it. For your OS, try the PlantUML website for help.
Next, install plantuml-mode in Emacs; it's in MELPA.
Edit your .emacs file
To get plantuml-mode working, I added the following to my .emacs file:
;; PlantUML Mode
(use-package plantuml-mode
  :ensure t
  :config
  (setq plantuml-jar-path "/usr/local/share/java/plantuml/plantuml.jar")
  (setq plantuml-default-exec-mode 'jar))

;; PlantUML in Org Mode
(org-babel-do-load-languages
 'org-babel-load-languages
 '((plantuml . t)))

(add-to-list
  'org-src-lang-modes '("plantuml" . plantuml))

(setq org-plantuml-jar-path "/usr/local/share/java/plantuml/plantuml.jar")
Also, because our mindmaps will be image files, we want our images to display inline in our org files. So, I added this too:
;; Displays images in-line in Org-mode
(setq org-startup-with-inline-images t)
Without any formatting, mindmaps in plantuml-mode look pretty dull. I don't need oil paintings but having different colors helps me find information faster. PlantUML allows for some decent formatting that looks almost identical to CSS.
You can add formatting in your mindmap but this becomes time consuming to add to every file. If it looks like CSS, we should be able to call it like CSS. Let's create a stylesheet.
In my .emacs.d folder, I created a plantuml-templates folder (optional) and created a file called style.puml. So, my filepath is ~/.emacs.d/plantuml-templates/style.puml
Below are the contents of that file:
<style>
  mindmapDiagram {
    node {
      BackgroundColor #282a36
      BorderColor #6272a4
      FontColor #282a36
      FontName "Droid Sans Bold"
      FontSize 14
    }
    :depth(0) {
      BackgroundColor #bd93f9
    }
    :depth(1) {
      BackgroundColor #ff79c6
    }
    :depth(2) {
      BackgroundColor #8be9fd
    }
    :depth(3) {
      BackgroundColor #50fa7b
    }
    :depth(4) {
      BackgroundColor #ffb86c
    }

  :depth(5) {
      BackgroundColor #ff6e6e
    }

  :depth(6) {
      BackgroundColor #a1e3a1
    }

  :depth(7) {
      BackgroundColor #84a9ff
    }

arrow {
      LineColor #6272a4
    }

</style>
Since I use the Dracula theme, my stylesheet is based around that. Getting the formatting right took longer than any part of the process to figure out. ChatGPT was a big help for setting colors down to :depth(7). Even engaging both Claude and ChatGPT, much of this I had to write myself through trial and error. If I hadn't gone into hyperfocus-mode, I'd probably have given up.
Still, a little work now is work I don't have to do later. When you see the results, you'll be glad your stuck with it.
Taking notes
Create your .org file to take your notes. Since plantuml-mode only reads headlines, you can quickly get lost. To avoid this, turn indenting on. In the metadata of your org file, add:
#+STARTUP: indentNotes
As I just mentioned, in plantuml-mode, everything is a headline. It doesn't know how to read bullets. Take your notes as a hierarchy of headlines. I'm reading Getting Things Done by David Allen. Here are my notes about projects:
  * Projects
  ** Defined as:
  *** Anything that can
  **** Be finished in 1 year
  **** Requires more than 1 step
  ** *Note:* A lot of what I list as tasks should be projects
  ** Project support material
  *** Best kept out of sight
  *** Next Action categories
  **** Next Action list
  ***** Non-actionable items
  ****** Trash
  ******* Keeping trash will undermine system
  ****** Incubate
  ******* Someday/Maybe list
  ******* Tickler file
  **** Waiting For list
  *** Calendar
  **** For tracking
  ***** Time-specific actions
  ****** Appointments
  ***** Day-specific actions
  ****** Things I need to do but don't have a set time
  ***** Day-specific information
  ****** Information useful for a certain date but not necessarily an action
  **** *Important:* /Don't keep to-do lists on the calendar!/
  **** If things that don't need to get done that day get tracked on the calendar, it will clutter and prevent getting done the things that do need to get done that day.
I'm leaving a mistake I made so you can see the results. In org-mode, bolded items are written between two * and italicized are written between two / . plantuml-mode won't read this formatting. I might be able to set this in the template file but I haven't tried. You can decide yourself if having that the * and / helps you identify those items are different.
Create your mindmap
Encase as a code block
You've already done the hardest part, so let's create our mindmap. Above the top headline of your notes, add the beginning of the code block:
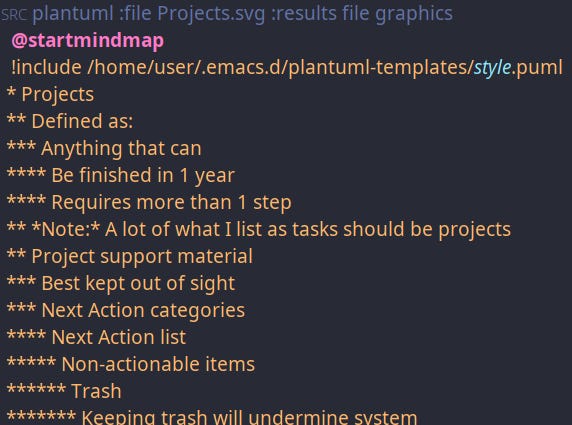
  #+BEGIN_SRC plantuml :file Projects.svg :results file graphics
  @startmindmap
  !include /home/user/.emacs.d/plantuml-templates/style.puml
On the first line, after :file, Projects.svg is your file name. You have some options for file format. Using PNG's didn't display the backgrounds as transparent, so I used .svg files.
In the !include line that calls our stylesheet, replace user with your username. You must have the absolute file path here or plantuml mode won't find your stylesheet. That file path should work on Linux and Unix, and MacOS should be similar. If you're using Windows, don't.
Now, close your code block by adding after your notes:
    @endmindmap
    #+END_ SRC
Indenting
As we're evaluating a code block, add two spaces to every line of your notes. If you're writing a huge mindmap, this can get tedious, so press <DOWN>, C-a, <SPC> 2x, repeating until done. Using the Dracula theme, each line will turn orange when it's properly indented.
Execute the code
Press C-c C-c to create your mindmap. You'll be asked if you want to evaluate the code. Naturally, you'll want to say yes. Then your .svg file is created in the same folder as your notes.
You'll see at the bottom, it created a file but is not displaying it, even though you added inline images earlier. You need to reload your org file. Go to the top of your file and press C-c C-c to reload it.
Now, our handy mindmap is created, using all the colors of the Dracula theme.
Note: when using mindmaps in Org-roam, I have to close the note and reopen it before my mindmap appears.

Though it's an image file, updating is easy. If I have to update the mindmap, I make my changes and press C-c C-c to rerun the code block.
Conclusion
Considering the setup involved, creating a mindmap in Emacs was more work than using Xmind or Logseq. I only had to do that work once though. And there were no guides for what I wanted to build. After building out my workflow, I probably move through Emacs with the same speed as Xmind or Logseq. While there are definitely easier ways of creating mindmaps, no one started using Emacs because it was easy.